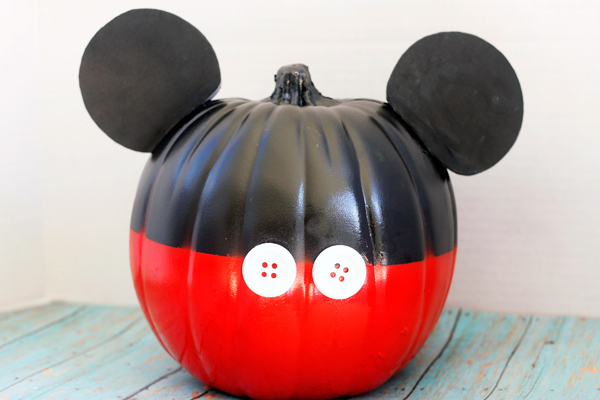
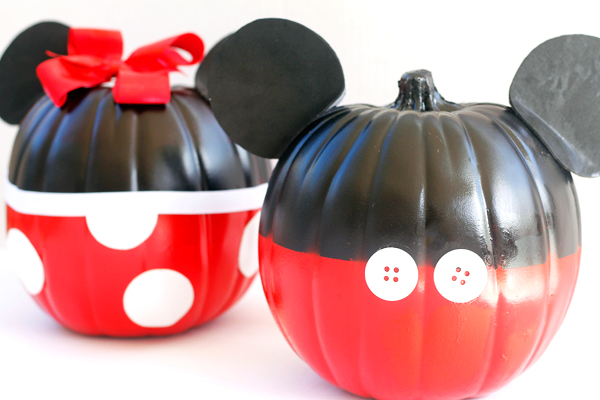
This no-carve pumpkin is easy and costs less than $20! Gather your supplies to make your own version of an easy Mickey Mouse no-carve pumpkin.
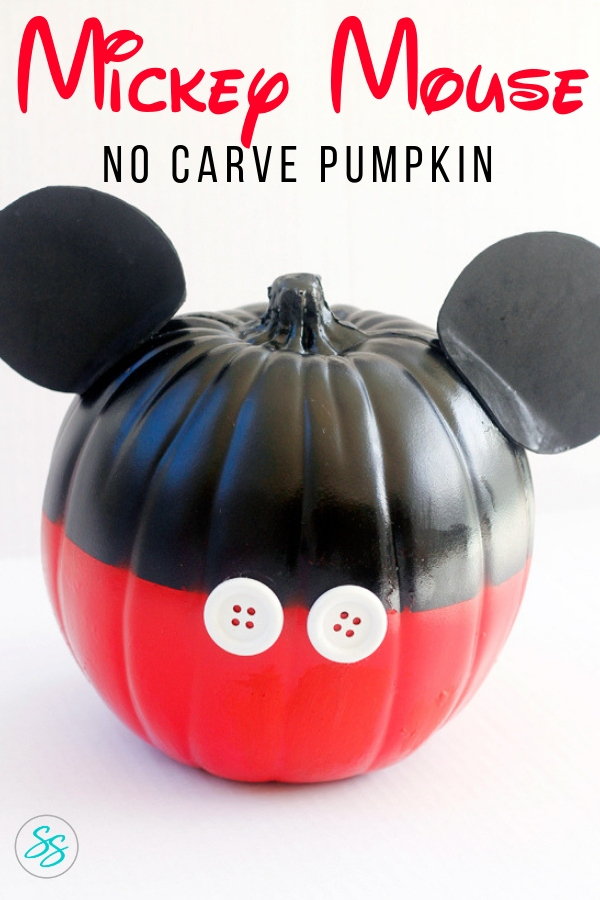
Mickey Mouse No Carve Pumpkin
 Whenever I get inspired to create something fun, I try to see what I have on hand first before I head to the store to purchase anything.
Luckily, I had a lot of the items I needed already on hand to create this easy Mickey Mouse no-carve pumpkin. I always recommend you use what you have before spending a lot of money. Don’t be afraid to get creative!
No Carve Supplies
After you’ve gathered an inventory of what you have, here’s what I used to create my pumpkin:
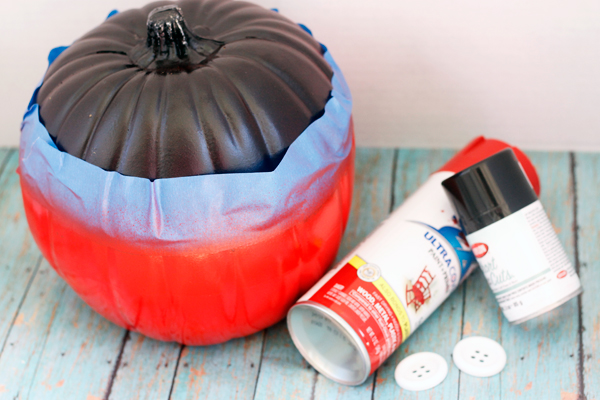
- Real or craft pumpkin (I chose a black one from Michael’s to make my work even easier)
- Red paint and black paint (if you chose a non-black pumpkin)
- Painter’s tape
- Spray adhesive or hot glue
- White buttons
- Black craft foam
Mickey Mouse Pumpkin Directions
 First, use your black paint to paint your entire pumpkin black and allow it to dry. If you picked up a black craft pumpkin at the store, you can skip this step and go straight to step two.
Next, you’ll want to tape off a straight line all the way around your pumpkin with the painter’s tape. Use old newspaper or something similar to protect the top half of your pumpkin. Paint the bottom half of the pumpkin red below the painter’s tape. Allow it to dry.

Cut out the black craft foam’s ears while the paint is drying. I found some foam that had a stick back to it, but I also used a little spray adhesive to keep the ears in the right place.
Finally, glue the buttons on the front to represent Mickey’s pant buttons. I had leftover spray adhesive from other projects, but hot glue or other forms of glue work just as well.