First grade is not kindergarten. These projects ain’t no joke, y’all. Having two kids means double the work for me, but at least this was fun and benefited both myself and my girls. Unlike Mackenzie’s Tinkerbell pumpkin, Caroline’s “Pigeon” had a lot of great variations to work off of on Pinterest.
If you’re looking for an easy no carve pumpkin, this is the perfect project for you. No complicated designs or artistic interpretations are necessary. Read on for how to make this easy, no-carve pumpkin inspired by Don’t Let the Pigeon Drive the Bus.
No Carve Pigeon Pumpkin
 Are your kids into the Mo Willems series of books? I had never heard of them until my girls went to school. They’re quite cute and fun for kids to read. The first series I was introduced to starred the pigeon, but there is also a series starring Gerald (an elephant), Piggie, and Duckling.
Caroline chose The Pigeon Wants a Puppy (I Really Do!) because her class is the “puppy” class of first grade. Gotta love a kid who knows her teacher and their class theme!
Supplies for the Pigeon Pumpkin
 Also unlike the Tinkerbell pumpkin, the shapes for Pigeon were easier to freehand and figure out based on drawings and other examples I found online. Here’s what you’ll need:
- Craft Pumpkin (any color is fine)
- Foam ball
- Yellow, White, and Black foam paper or construction paper
- Paper towel or toilet paper roll
- Blue Spray Paint (We used Krylon Blue Bonnet)
- Black Pipe Cleaners
- Hot Glue & Hot Glue Gun
Directions for the No Carve Pigeon Pumpkin
 First, spray paint your pumpkin. While spraying it down, spray your paper towel/toilet paper roll tube and foam ball as well.
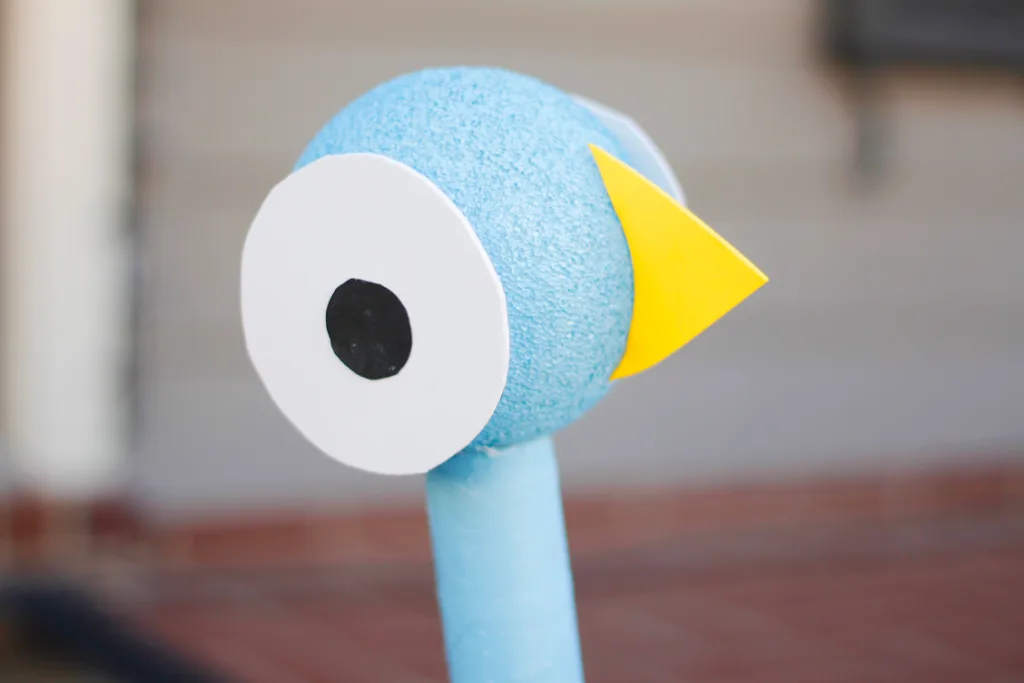
While that is drying, trace the wings of the pigeon on the white foam paper. This is where Caroline helped me out. Spraying paint wasn’t as easy as it looked, and she was much better at cutting out the shapes I needed.
Sarah’s Tip: Foam paper was my friend for this project. It was sturdier than plain paper or even construction paper, but if you want to save time and money, use what you have.
Tips for Painting the Pumpkin
 When giving the pumpkin, foam ball, and tube a second paint coating, go ahead and coat the wings too. Allow everything to dry between coats. As the paint is drying, trace and cut large white circles for the eyes and small black circles for the pupils.
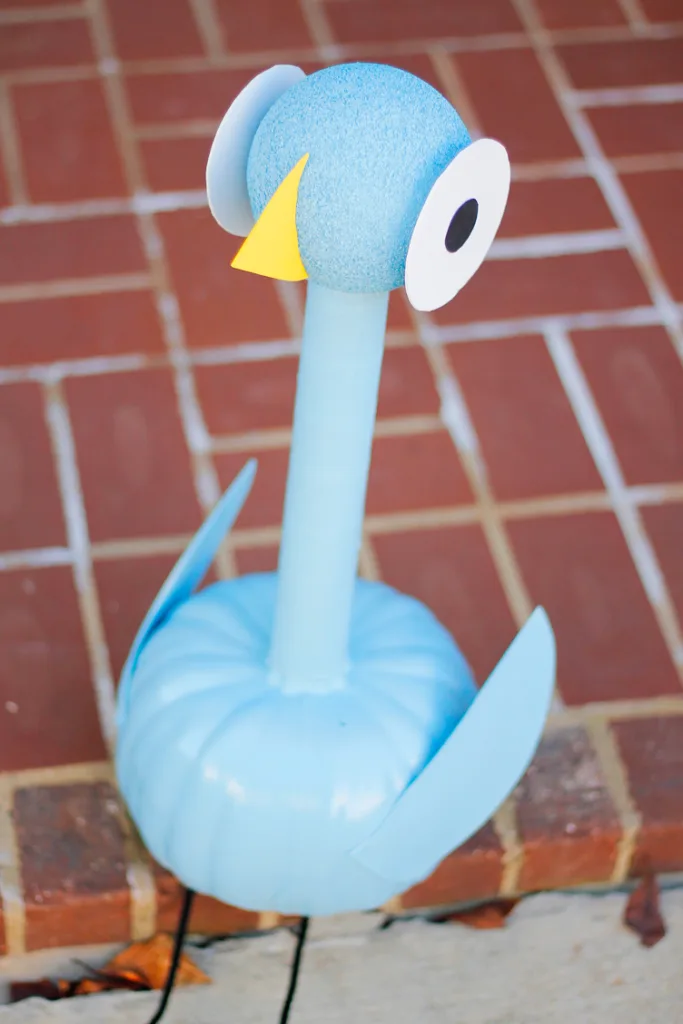
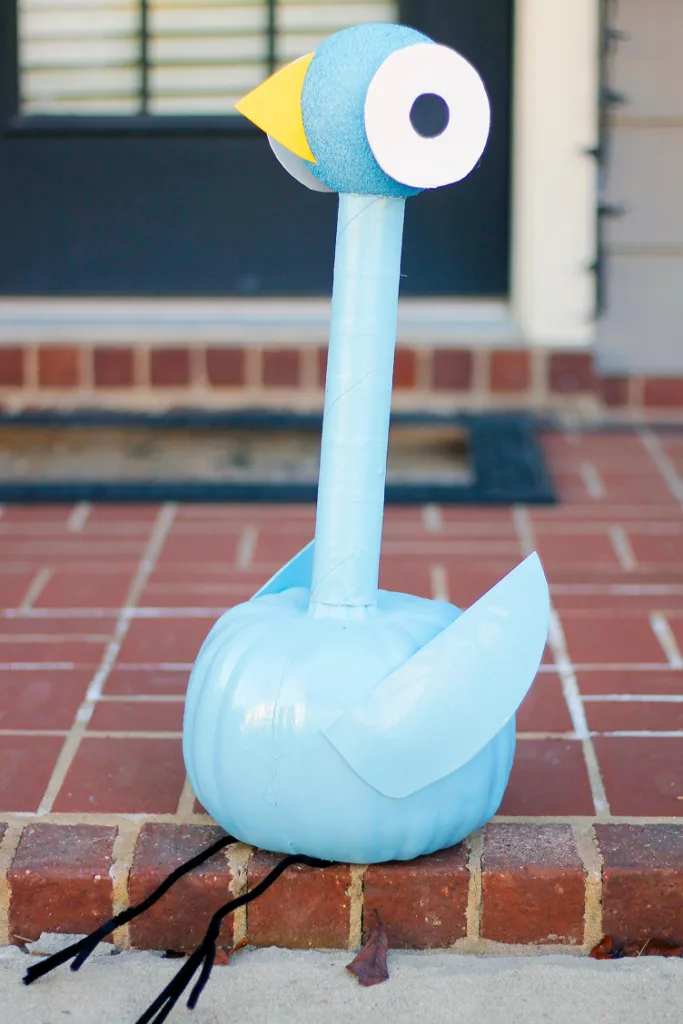
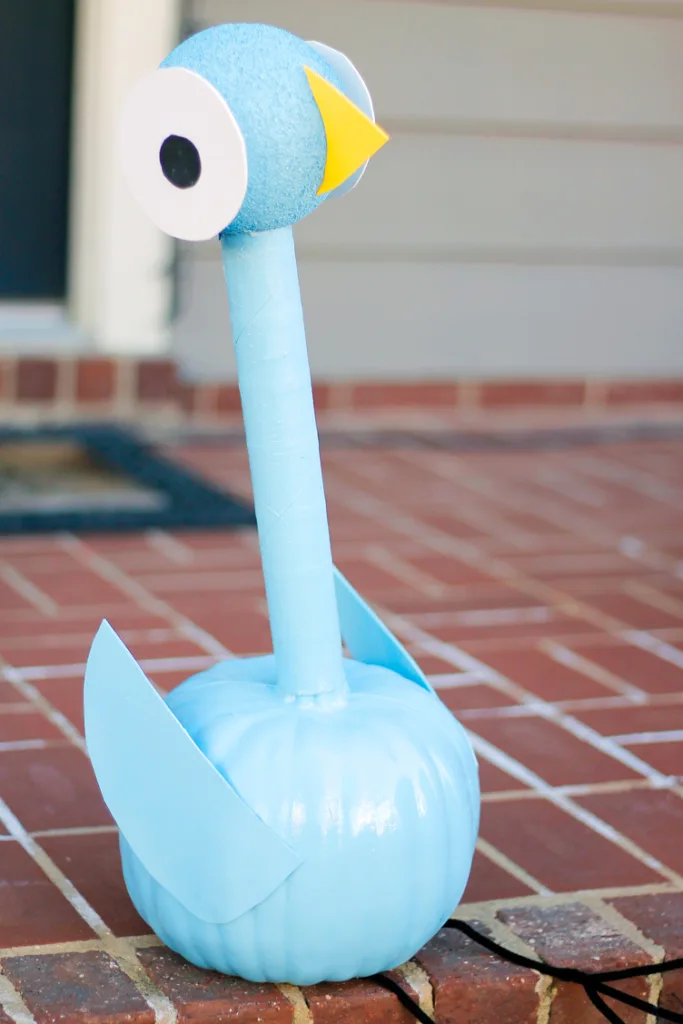
Children can cut these out and glue them together with regular glue. For the “beak,” I cut a triangle but then had to cut it into a curve at the bottom edge so it would lay flat on the foam ball. Finally, it’s time to assemble! Glue all the pieces on (foam ball, eyes, beak, wings, paper tube) with hot glue.
Sarah’s Tip: Glue the “head” on the “neck” before you glue the “neck” to the pumpkin stem.
How to Create Pigeon Legs
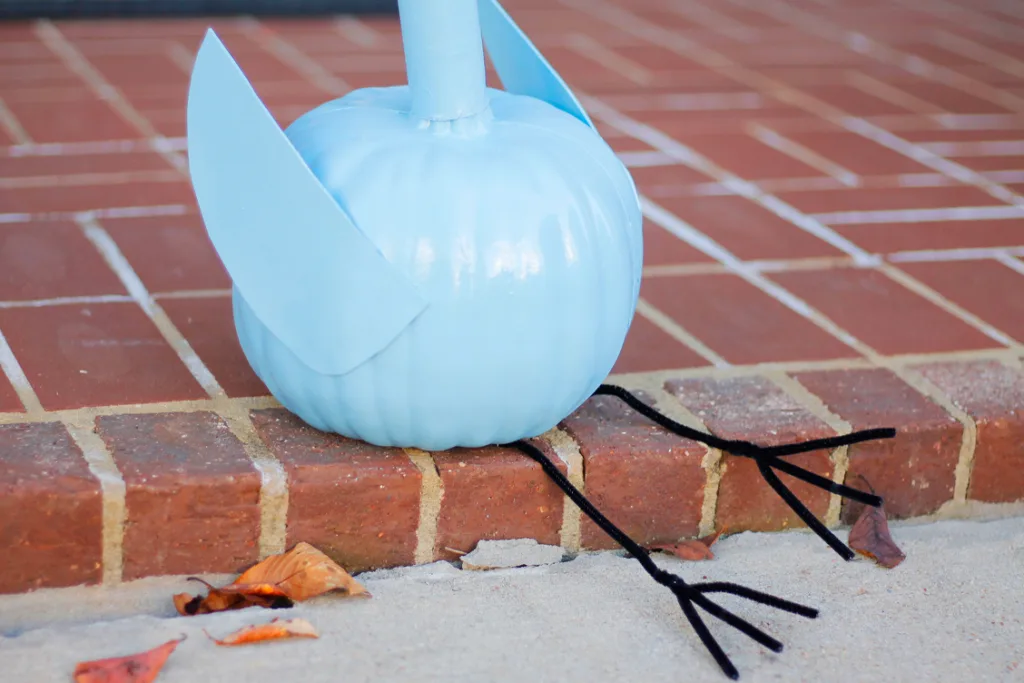 The legs can be a little tricky, so feel free to improvise for yourself. I twisted two pipe cleaners around at the bottom to create the “feet,” then hot glued them to the bottom of the pumpkin.
They didn’t stay attached as long as I’d hoped, so I ended up using black electrical tape to hold them on. You gotta do what you gotta do, right? I’m happy to report that both pumpkins survived carpool drop-off and walking down the hallway to class. Whew!